eStore Modules
- Account Settings
- My Plan
- Analytics
- Design
- Store
- Products
- Order Fulfillment
- Orders
- Promo Code
- Settings
- Locations
- Customers
- Engagement
- Plug-ins
Account Settings
Upon login, you will be directed to your Account Settings page which shows your:
- different configurations for your account information
- eStore's Terms and Conditions (T&Cs) and Privacy Policy
- account users
- security settings
- account's extensions (available to select subscriptions only)
- documents
On the My Profile tab, you can edit your:
- company information
- details of your authorized company representative
- your billing information
Once all details are provided, click Update.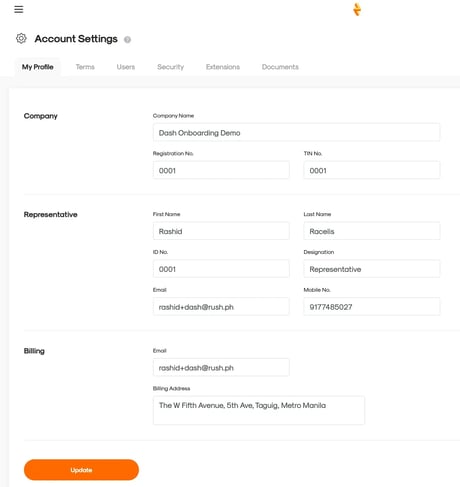
In the Terms tab, you can outline agreements between yourselves and your customers, ensuring transparency and legal compliance in your business operations. You have the option to utilize our provided template or create your own.
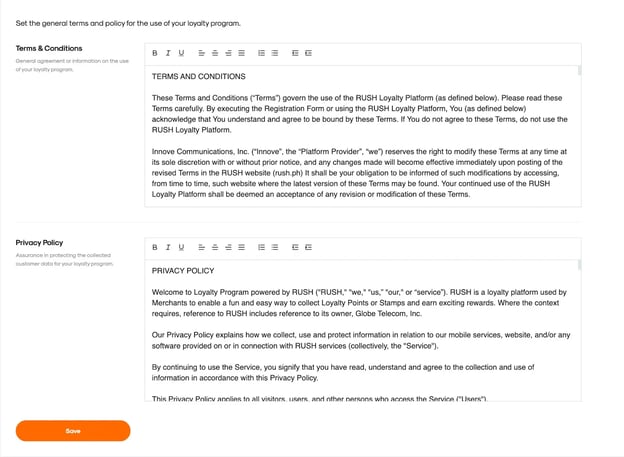
Your Terms and Conditions section defines the agreement for using your eStore - rules, regulations, and responsibilities you and your customers must follow.
In the Privacy Policy section, you can assure the protection of your customers’ data by outlining the types of data collected, how it's used, and the security measures taken.
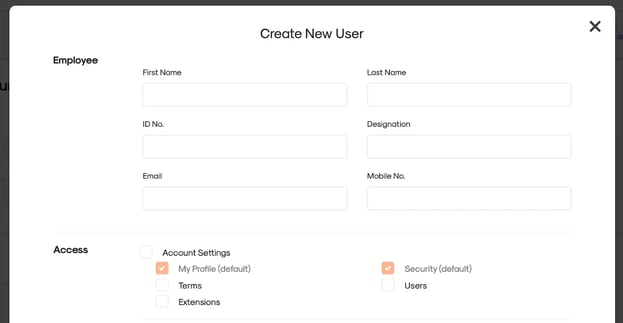
The next tab of your Account Settings page is for Users. As the main administrator of your merchant account, you can add your employees as account users with CMS access, granting them business management privileges to your digital storefront.
- To enroll a new account, just click + New User.
- From this window, you may input the employee’s details. A copy of their new account login credentials shall be sent to the email address you provided.
- Apart from the employee information, you can also manage their access and capabilities by ticking the preferred boxes. Ex: store frontliners usually only have access to the Store and Order Fulfillment modules.
- Click Save, and you’re done!
The next tab of your Account Settings page is for Security. This is where you can update your CMS login password.
For security purposes, password changes are allowed for your own account only; no other user will be able to change CMS passwords on behalf of other accounts.
Once done, click Update.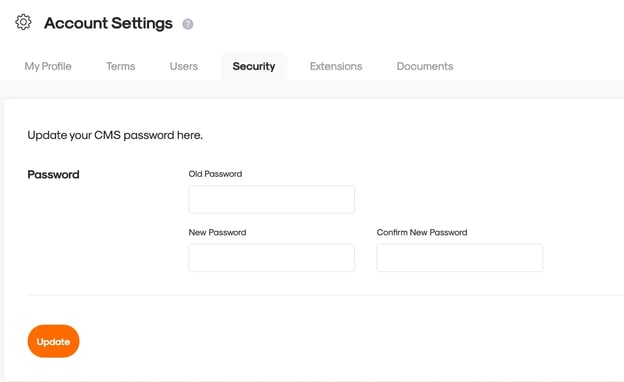
The next tab of your Account Settings page is Extensions. This is where you can find the links to your online storefront (eStore web link, your Customer App download link), as well as the links to download the RUSH Merchant app.
Here, you can also input a Marketing Tag for your eStore website. Adding your Container ID allows you to track your website performance through Google Tag Manager.
This tab is only available to select eStore subscription tiers.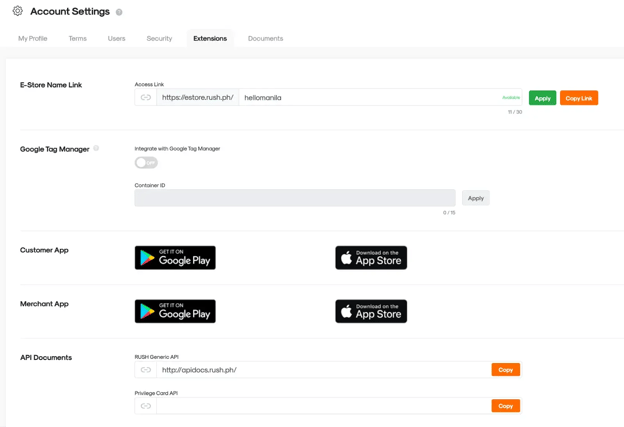
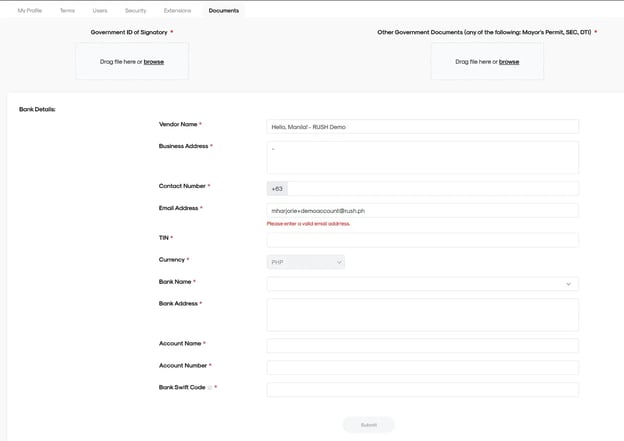
Lastly, you have the Documents tab. This is where you can upload and supply your requirements such as the Government ID of your Authorized Signatory, and Bank Details.
These documents are required to settle your billing and payout, so please provide them immediately to avoid delays.
Other Settings
For accessing additional account settings, resources, your Plan, and more.
On the upper right section of your screen, there is a drop-down arrow beside your name that lets you access the following:
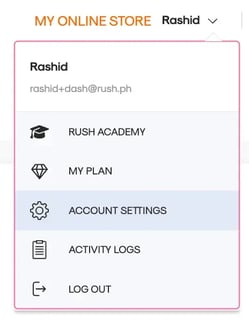
- RUSH Academy - where you can complete the initial setup of your eStore
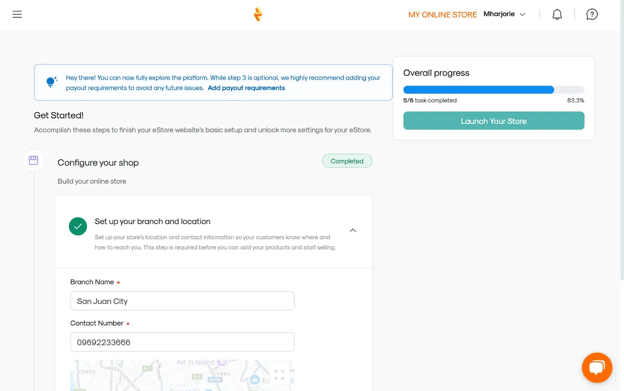
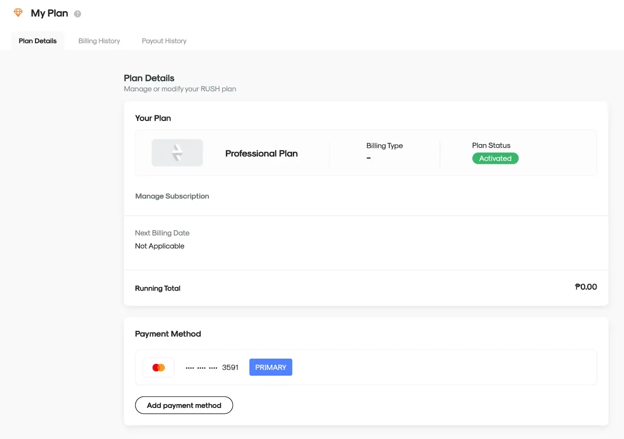
- My Plan - where you can access your Plan Details - such as your subscription info, next billing date, and more. You can also access the following:
- Manage Subscription - If you wish to unsubscribe from your plan, you can indicate your reason for cancellation and click “Yes, cancel my subscription”.
- Billing History - shows details of your payments and the status of every payment made
- Account Settings
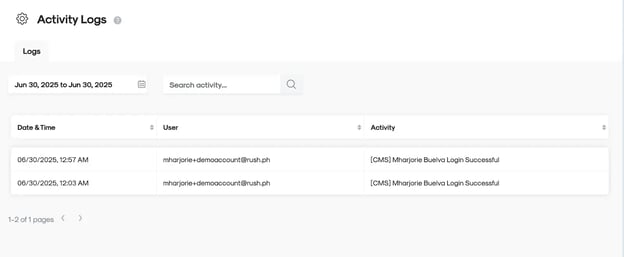
- Activity Logs - View all the actions performed by users authorized to manage your CMS
- Log Out
Analytics Module
This summarizes the basic transaction-related data/ trackable metrics from your RUSH-powered solutions. From this module, you can:
- See all the transactions where your customers earn and burn points
- Check the number of registrations and current users
- Monitor your top branches and rewards
To qualify for an analytics dashboard subscription for an e-store, you must have completed at least 10 successful transactions in the previous quarter. A successful transaction is defined as one that was completed without any issues or complications, such as: canceled, etc. It means the transaction must be tagged as delivered to qualify.
Design Module
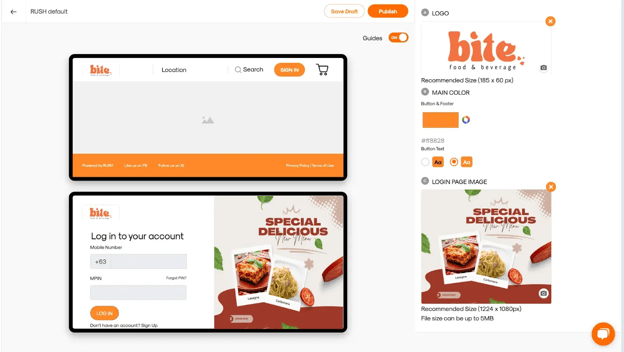
Uploading a web logo, login page image, button colors, and your preferred text is important to keep the website looking current and relevant. Well-designed buttons and clear categories aid in easy navigation and user-friendliness.
You can update the following via CMS on Design module > Web tab > Create:
- Brand Logo
-
- Required: size should be 185 x 60 px (horizontal)
- Main Color - Button & Footer
-
- You can change this by clicking the box and choosing your preferred color.
- Button Text - You can choose your preferred text color if white or black
- Login Page Image
- Required: size should be 680 x 600px (horizontal). File size can be up to 5MB
Once done, Enter a Title then click Save Draft or Publish right-away.
You can customize the following under Advanced Settings. Read here for more details.
Icons & Logos
-
Web Favicon: .ico, 32x32px
-
App Icon & Web Logo: Upload all 3 to save changes
Snippet Details
-
Add/edit your Snippet Title & Description for SEO
-
Changes may take time to reflect on search engines
Order Status
-
Customize status pages (Pending, Processing, etc.)
-
Upload:
-
Header Image: 1140x270px
-
Status Icon: 48x48px
-
-
Option to turn on Order Status Colors
-
Mockup preview included
Web Sequence
-
Show/hide or rearrange homepage sections using toggle and drag
About Us
-
Section title (e.g., “About Us”)
-
Short Info (max 200 characters)
-
Optional image (304x127px) and longer message via “More Info”
Categories
-
Highlight up to 5 product categories
-
Select color and add/edit categories
Our Brands
-
Feature up to 7 onboarded brands
-
Upload each brand’s logo or image
-
Only onboarded brands will appear (add more via Store module)
Store Module
For managing Brands, Branches, and Employees. Now, we start building your digital store through the Store module, starting with the Organization tab.
Here, you may find some of the most important building blocks of your online store:
- Merchant App ID - the code you will use when logging in to your RUSH Merchant App
- Brands and Branches - where you can enroll* and manage all the Brands and Branches of your digital store. By default, a Brand and Branch is already made for you.
In this window, provide the needed details/assets:
- Brand name
- Brand logo
- A short description of your brand (optional)
Keep the Visibility section toggled on to ensure your updated brand appears on your customer channel/s.
When you’re done, click on Submit.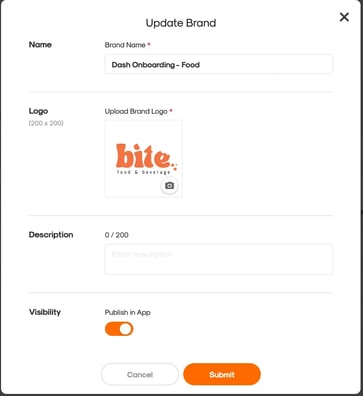
After updating the default Brand, expand the section to show the default Branch. Update the Branch by clicking the Pencil icon.
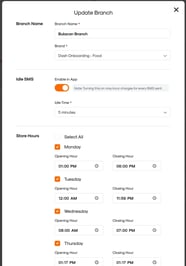
In this window, provide the needed details/assets:
- Branch Name - First, add a name to your Branch. Then from the dropdown menu, select the Brand under which this Branch will be added.
- Idle SMS - This feature is optional and can be enabled for your store if you want to receive SMS prompts for unprocessed orders, subject to carrier charges. Under the Idle Time menu, select the amount of time that should elapse before an idle SMS alert is sent. The SMS will be sent to the branch's registered mobile number.
- Store Hours - To set the Branch's operating hours, you may tick Select All if you are open every day, or choose specific days individually. Afterwards, add your operating hours for each day.
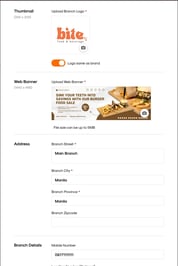
- Thumbnail - After setting your store hours, scroll down to add a thumbnail for your branch. You may upload a branch logo or toggle "Logo same as brand" to use your brand logo for this branch.
- Address - Accurately provide the information needed. This will be used by your delivery riders to locate your stores, and will be the basis of the delivery fee.
- Branch Details - Add the mobile number and landline number (optional) where customers can reach your branch. This is also where the Idle SMS prompt will be sent (if enabled).
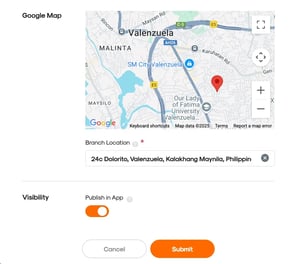
- Google Map - Add your Branch location and pin it on the map. For accuracy, you can zoom in, zoom out, or move the map.
- Visibility - Toggle this option on to publish your Branch on your channel/s.
Once done, click Submit. Repeat the previous steps to add more Branches for all your Brands.
After updating your default Brand and Branch, you can add new Brands by clicking the + button in the Brand block.
On this window, provide the needed details/assets to add your brand.
Repeat the steps outlined in the update Brand section. Do the same for all additional brands.
Recall the process for updating Branches and apply the same steps here. Do the same for all additional Branches.
*Disclaimer: the number of brands and branches that can be activated depends on your subscription plan. Should you want to add more branches beyond the cap of your subscription, contact support@rush.ph
You may also upload all your Brands and Branches in bulk.
Just click on Download Template, accomplish the file, and click the Upload button to import your accomplished file.
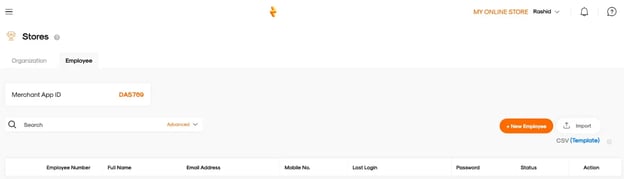
Now, it's time to add your employees who will have access to your Rush Merchant App, a useful tool that allows front liners to manage your branch's operations.
Go to the Employee tab of the Store module and click the + New Employee button to add authorized employees.
On this window, provide the following:
- Employee Details
- Input their Full Name, Email Address, and Mobile No.
- Choose the Brand and Branch the employee is assigned to.
- Make sure that the Status is toggled on so the employee can access the RUSH Merchant App. If the employee's access needs to be temporarily disabled, toggle this off.
- Password - For security purposes, you may also enable and nominate a 4-digit pin.
Once done, click Submit.
You will then be redirected to the Store module's Employee tab which displays all the employees with RUSH Merchant App access. The app can be downloaded from the App Store (iOS) and Google Play (Android).
To use the app, your front liners should input your Merchant App ID, their registered Employee Number (shown above), and their Password (if you nominated a 4-digit pin).

Products Module
This is where you manage all the products that are offered on your customer channels, and ultimately, generate revenues for your business.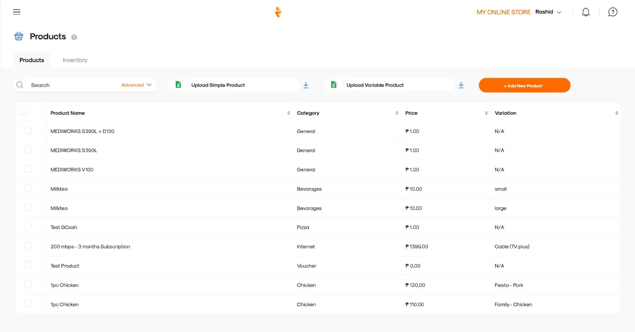
Uploading a Simple Product
Go to Products Module > click +Add New Product.
Fill in the following:
-
Basic Details: Name, Description (max 2,500 chars), Price, SKU
-
Tag to Branch: Toggle Visibility ON
-
Special Discount: Optional
-
Product Images: 638x310px, up to 10 images
-
Category: Select or create a new one
-
Add-ons: Define groups (e.g. “Extras”), allow multiple selections, indicate price/SKU
Click Add Product to finish.
Uploading a Variable Product
Follow the Simple Product steps, then add:
- Variations: Click +Create Variant, then add Variant Name (e.g., Size) and Options (e.g., Small, Medium)
- Variation Details: Assign Price and SKU for each option
Click Add Product once done.
Bulk Upload
For larger catalogs:
- Download the appropriate product template
- Fill in product details
- Upload using Upload Simple Product or Upload Variable Product
- Tag products to brand/branch after upload
Managing Inventory
Under the Inventory tab, make branch-specific updates:
- Regular Price: Set custom prices per branch
- Stock Quantity: Turn on toggle to edit; tick for unlimited stock
- Sale Items: Choose discount type and sale duration
- Product Visibility: Toggle OFF to hide product in a branch
Click Save Changes or Save All after updates.
To edit or delete a product: Hover over the product → Click the Pencil icon (edit) or Trash icon (delete)
Done! You’re all set to manage and customize your product catalog.
Order Fulfillment Module
The Order Fulfillment module consolidates all the configurations related to order delivery and pick-up.

1. Delivery Tab
Set up same-day and pre-order deliveries.
-
Deliver Now:
-
Enable option
-
Select applicable Brands & Branches → Click Apply
-
-
Pre-Order Schedule Settings:
-
Enable Scheduled
-
Set Minimum Lead Time (e.g., 30 mins)
-
Set Duration for advanced booking
-
Assign to Brand & Branch
-
-
Pre-Ordering Settings:
-
Set Pre-Ordering Days/Times
-
Edit Operational Days via Store > Branch settings
-
Save settings per branch
-
2. Pickup Tab
Set pickup schedules per branch.
-
Sync with Delivery settings using checkboxes
-
Or configure manually (same steps as Delivery tab)
3. Fees Tab
Control delivery charges:
-
Deliver Now:
-
Choose Fixed or Dynamic
-
Dynamic Example:
-
Base Fee: ₱70
-
Base KM Range: 1 KM
-
Added Value/KM: ₱7
-
-
-
Enable Minimum Spend Delivery if offering free delivery with spend threshold
-
-
Scheduled Delivery:
-
Tick “Same as Deliver Now” or repeat above steps
-
4. Settings Tab
-
Order Notification:
-
Enable email alerts for new orders
-
Add/remove recipients as needed
-
-
Notes to Customer:
-
Title: Max 20 characters
-
Instruction: Max 100 characters
-
Shown at checkout for special instructions
-
Click Save Changes after setting up each section. Repeat per branch if needed.
Orders Module
Displays all orders placed by your customers on your RUSH-powered eStore. This makes it easy to review past and ongoing transactions.
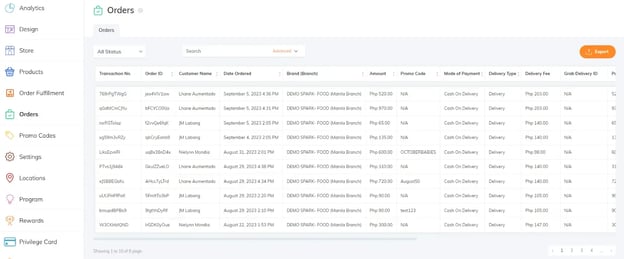
You can also manage/process orders from this tab, or export your order history and receive the spreadsheet file in the email address associated with your RUSH account.
The number of columns shown in this window depends on your monitor's display settings. To show the rest of the columns, drag the scroll bar to the right. This will display the remaining order information such as the Brand and Branch from which the order was made, the mode of payment, the delivery type, and the order status.
To update the status of an order, click the Eye icon in the Action column.
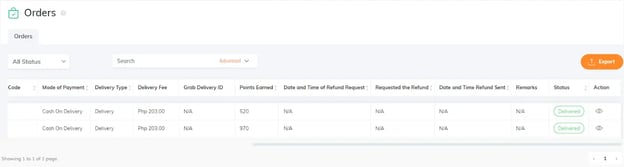
The Order Details pop-up window displays all the information about the specific transaction, including your customer’s details and the items in their cart.
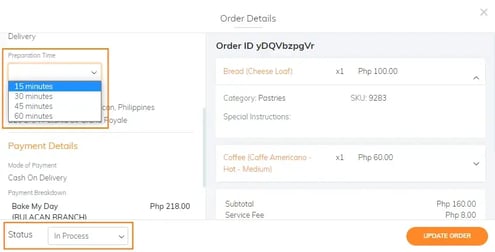
You can also process orders from this window by specifying:
- Preparation Time - When applicable, you can set this with options from the dropdown menu.
- Order Status - Choosing the appropriate status from the dropdown menu. All updates will be reflected in your customer's Order Status page in real time.
Once done, click the Update Order button.
Note: booking a delivery rider can only be done by the store front-liner from the RUSH Merchant App. Read this article to know how to book a rider.
Promo Code Module
This module displays all the promo codes you enabled for your store campaigns. You may look through your existing codes with the Search function, either by name or category. You may also update an existing code by clicking on the Pencil icon under the Action column. To delete an existing code, click the Trash icon.
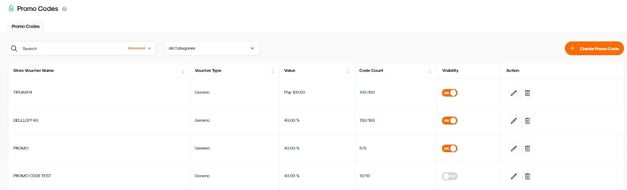
To activate a new promo code, click the +Create Promo Code button.
There are two types of promo codes:
- Generic codes are those that can be used by all your customers. Sample codes:
- CHRISTMASRUSH
- RUSHWELCOME
- Unique codes are those that can only be used once and are only given to specific customers. Sample codes:
- KENTYBIRTHDAY10
- MKBDAYBASH20
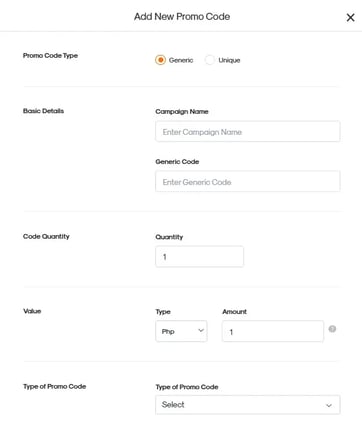
To set up a Generic code, choose the Generic option in the Promo Code type.
Complete the needed information, such as:
- Promo Code Details:
- Campaign Name - Provide the name of the promo (ex. “Christmas 10% Discount”)
- Generic Code - Place the alphanumeric code that customers will use upon check out. (ex. RUSHXMAS10)
- Campaign Name - Provide the name of the promo (ex. “Christmas 10% Discount”)
- Code Quantity - The maximum number of times the code can be redeemed from your RUSH-powered store.
- Value - The discount value associated with the generic code
- Type and Amount - Can be set as an absolute value (in PHP) or a percentage (in %) of total cart cost.
To set up a Generic code, choose the Generic option in the Promo Code type.
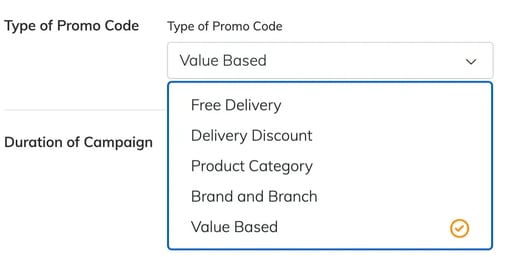
Complete the needed information, such as the Type of Promo Code, where you choose among the following:
-
Free Delivery - You can offer a free delivery to your customers by turning this on. When enabled, the Value and Delivery Discount fields will be disabled.
-
Delivery Discount - If you don't want to offer free delivery, you can instead offer a delivery discount by turning on this option and adding the discount rate.
-
Product Category - You can offer a discount for a specific product category.
-
Brand and Branch - If you have multiple brands or branches you can create a promo code for a specific brand or branch.
-
Value Based - You can also offer a promo code for the total product value of your customer’s purchase.
To set up a Generic code, choose the Generic option in the Promo Code type.
Complete the needed information, such as:
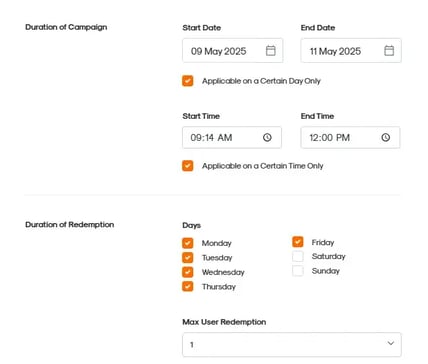
- Duration of Campaign
- Set the validity of the promo code by checking the Applicable on a Certain Day Only option.
- When unchecked, the promo code will be active until the maximum redemption is reached.
- You can also set a specific time period and/or when the code can be used.
- Duration of Redemption
-
Days - This is where you choose the specific days when the code can be accepted by ticking the boxes.
-
-
- Max User Redemption - You can also set the redemption limit for each customer here.
- Max User Redemption - You can also set the redemption limit for each customer here.
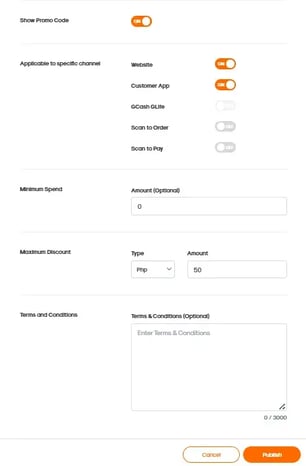
Complete the needed information, such as:
- Show Promo Code - When toggled on, the code will be visible upon customer checkout.
- Applicable to specific channel - This is where your customers can use the code upon checkout. For example, if you want a web-exclusive offer, toggle off the other channels (Website, Customer App).
- Minimum Spend - The minimum spend required to use the code.
- Maximum Discount - This sets the discount limit/cap that your customers can get for their purchase when they use the code.
- Terms and Conditions - You can indicate your terms and conditions for your promo code.
Once done, click the Save button.
To set up a Unique code, choose the Unique option in the Promo Code type.
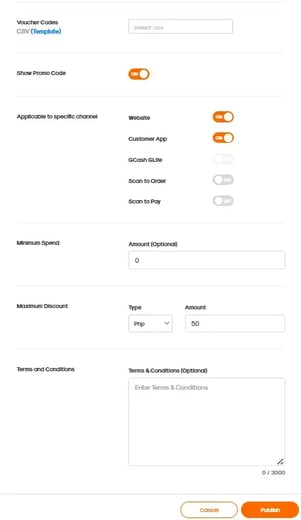
Activating unique promo codes follow the same steps as the Generic code’s setup. However, you will be required to:
- upload a .CSV file of your Unique codes, unlike the Generic code setup that only requires one code. In the Voucher Codes section, you may download the .CSV file template.
- Upload a fully-accomplished version in the same section’s Select .csv field.
- Then, update the rest of the remaining fields following the steps in setting up Generic codes.
If you want to edit the promo information of an existing code, click the Pencil icon to show the edit window.
Please note that for Generic codes, you may no longer update the following once activated:
- Promo Code Type
- Code Quantity
- Type of Promo Code
- Duration of Redemption - Max User Redemption
However, you can still edit the following:
- Promo Code Details - Campaign Name
- Value
- Duration of Campaign
- Duration of Redemption - Days
- Maximum Spend
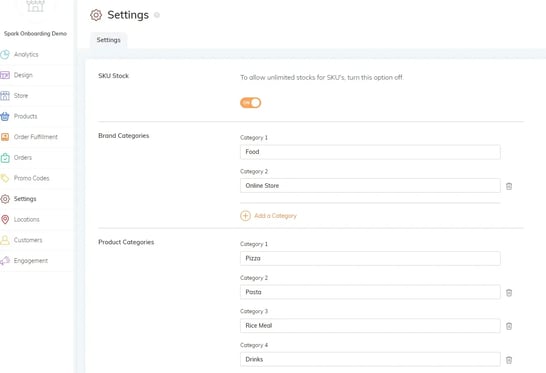
Settings Module
Other dynamics of your eStore can be updated under the Settings module:
SKU Stock
- When turned on, this will not allow your customers to check out items that are out of stock.
- When turned off, this presumes that you have unlimited stocks for all your items and will not require you to update your remaining inventory per branch.
Brand and Product Categories
- These are essential before you can upload your products.
- You may add more categories by clicking the + Add a Category button, rename an existing category, or delete an existing category.
Other dynamics of your eStore can be updated under the Settings module:
Radius
- The circular distance around your store/branch (in KM) which determines the areas your store will be able to serve. Your store won't be visible if your customer's location is outside of the kilometer radius you set.
Fees
- This allows you to charge additional fulfillment costs (like service charge or packaging fee) to your customers for every order.
- To enable custom fees, toggle this option on and click + Add New Fee.
- Label your custom fee and set the value (in PHP or percentage of total cart cost).
- Repeat the same steps if you have additional custom fees.
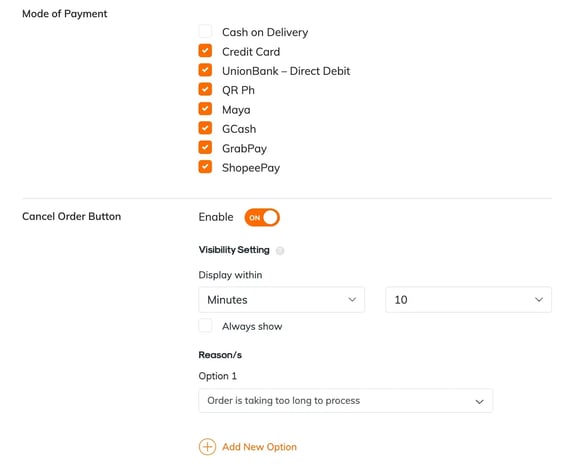
Mode of Payment
- This allows you to accept payments in different ways. However, GLife stores only accept payments via GCash.
Cancel Order Button
- Turning this ON allows customer-initiated order cancellations.
- You can choose the visibility setting for the cancellation button, either displaying it every time the order is updated or only within the allowed time frame (ex: 10 minutes)
- You may use preset cancellation reasons or provide your own, allowing customers to specify why an order is not pushing through.
- If you don’t want any customer-initiated cancellations, turn this option OFF.
Once you are done, click the Save button.
Locations Module
After successfully uploading all your products, inventories need to be tagged per Brand and Branch to appear on your eStore.
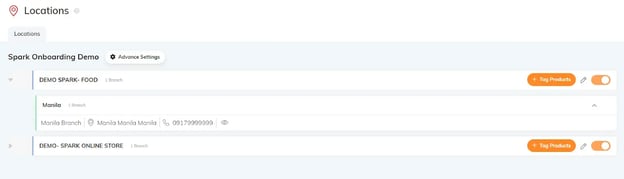
To manually tag your products to your Brands and Branches, go to the Locations module. Click the + Tag Products button in your selected brand to display your list of products.
The Locations Module only shows onboarded brands and branches. Should you need to add more Brands and/or Branches*, you can go to the Store module of your CMS and repeat the steps on adding Brands and Branches.
Note: the number of brands and branches that can be activated depends on your subscription plan. Should you want to add more branches beyond the cap of your subscription, contact support@rush.ph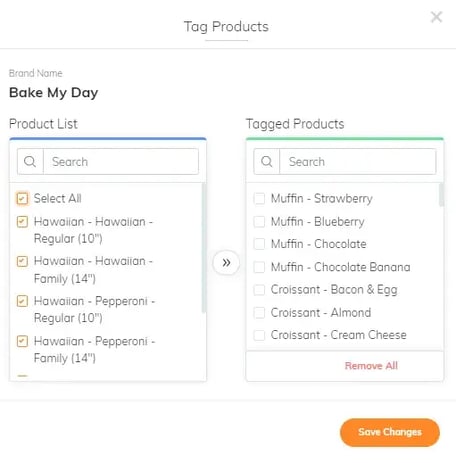
You may now start tagging products for specific Brands:
- Select the Products that you will tag under your Brand. You can choose products individually or click Select All.
- Click the arrow button in the middle to move these items under Tagged Products.
Once all your products are tagged to your brand, click the Save Changes button.
If you have multiple Brands, make sure that all your products are tagged appropriately to their respective Brand. By default, all Products tagged to a Brand will automatically be tagged to all of the Brand's branches.
If you wish to untag products, you may also do so here by clicking on the products for removal under Tagged Products, then clicking on Remove Selected, then clicking Save Changes.
Customers Module
This module gives you a snapshot of your customer base - their activities, and your customer segments.
The Transaction History Tab is a record of all a customer's past interactions with your eStore, specifically focusing on their purchases from your business.
By reviewing a customer transaction history, you can gain valuable insights into customer behavior and their buying habits. This information can be used to improve customer service, personalize marketing campaigns, and recommend products that align with past purchases.
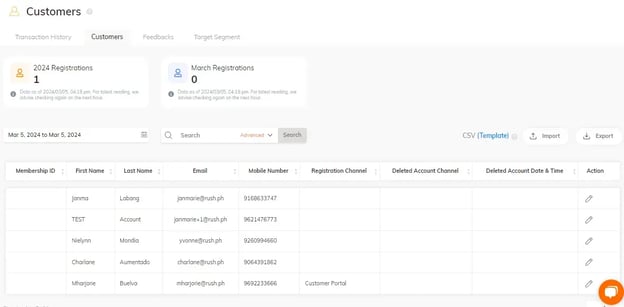
Go to the Customers tab, where you may do the following:
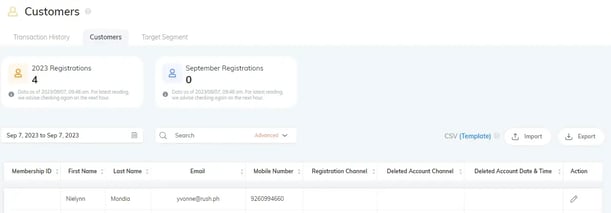
See how many customers have registered and purchased from your eStore.
- A summary counter shows the total count of customer registrations for the month and the current calendar year.
- You may also set a date range to show a list of customers who registered during a certain period, or you may search for specific customers using the search bar.
- Advanced search parameters are also available.
Import or Export your existing customer list.
- You can upload an existing customer base with the Import button.
- You may also save an external copy of your customer base from your CMS by clicking the Export button. A download link shall be sent to your registered email address.
Customer feedback is an essential feature of the CMS. It would show that as a business, you value your customers' opinions and consider their inputs for service improvements.

To manage this, head to the Feedbacks tab, where you may do the following:
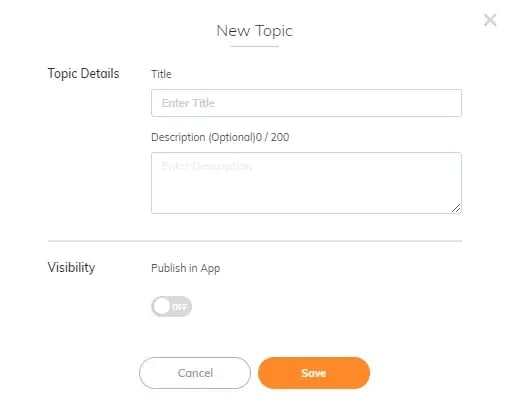
- Add a feedback subject by clicking Create New Topic
- Provide the Topic Details, such as the Title, and Description that gives more context for the subject matter.
- Toggle Visibility on so that it’s visible on your customer channels.
Click the Save button to complete your set-up.
You can also export your customer feedback on this tab by clicking on the Export button. Just make sure to adjust extraction date range as preferred.
Note that this feature is only applicable to merchants with the Customer app.
As a merchant, you may create target segments for your engagement activities, and send broadcasts to your specific customers either via SMS and/or email.
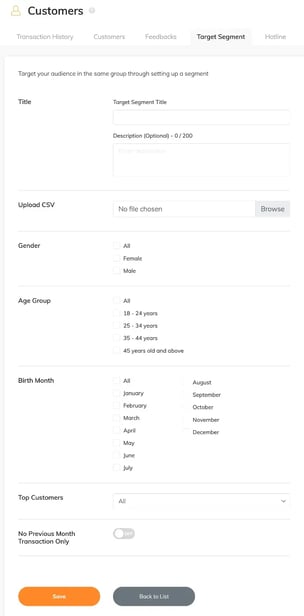
To start, head to the Target Segment tab, click on the + New Target Segment, then:
- Provide Title details: Give a Target Segment Title and a Description which can give more context for the grouping
- If you wish to target specific customers and have their mobile and/or email numbers, you may click on Upload CSV to identify and whitelist them.
- If you’re targeting customers with similar characteristics, you may select the Gender, Age Group, and Birth Month of your preferred audience.
- If you’re reaching just the highest-transacting customers, you may click on the Top Customers dropdown field and opt to limit to just 100, or 200 of them.
- You may also choose to re-engage with the less active segment of your customer base by choosing the No Previous Month Transaction Only option.
Once you’re all done, click on Save to create your target segment.
Engagement Module
This module is an important marketing tool that allows you to promote directly with your customers - through notifications, SMS, or email broadcasts - about new promos you may be running on your eStore.
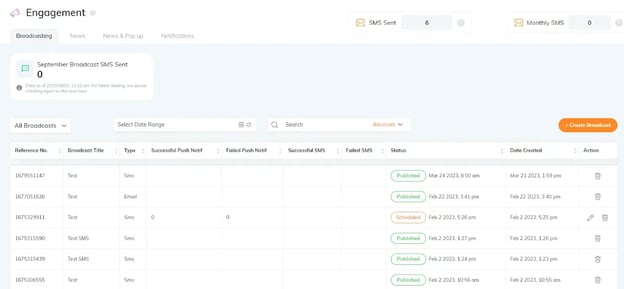
To start, head to the Broadcasting tab and click on the + Create Broadcast button.
There are three types of broadcasts:
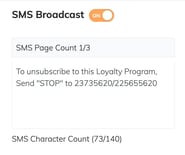
- SMS Broadcast
- The most straightforward and sure way to reach your customers, as they won’t need internet access to receive these messages.
- Required: the standard length of an SMS is 140 characters. It can extend longer than 140 but every 140-character content will be counted as 1 SMS sendout.

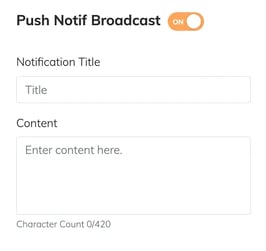
- Push Notif Broadcast
- This is a powerful tool that sets notifications for your customer app. This broadcast shall only be received if your customer has your mobile app installed and is logged in.
- Recommended: Keep the Title short but eye-catching.
- Required: Besides a notification title, this will require you to add the main broadcast message. The Content has a 420 character limit.

- Email Broadcast - Once your customers verify their emails linked to the CMS, they may start receiving these broadcasts in their nominated email address.
- Email Subject
- Logo - Required: size should be 325px x 108px (horizontal)
- Header Image - Required: size should be 500px x 285px (horizontal)
- Content
Once you’ve chosen your preferred broadcast type and have filled up the required assets and information, you must then:
- Click on the Continue button
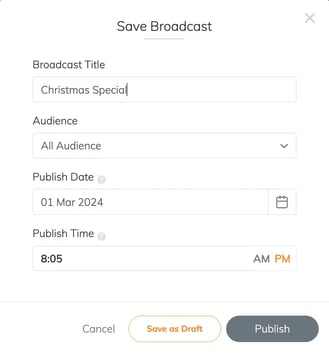
- Add a Broadcast Title
- Select an Audience
- You can send the broadcast to all your customers
- You may also send it to specific audiences. For this, you must create a Target Segment by heading to the Customer Module > Target Segment tab
- Set a Publish Date and Time
You may then click on:
- Cancel - to leave without saving any broadcast setup you may have already accomplished. You may have to start from scratch the next time you access this feature.
- Save as Draft - to save your progress and launch the broadcast some other time
- Publish - to launch the broadcast according to the set schedule.
Another effective method to reach your customers would be to run pop-ups that appear on your channels. To run these for your business, open the News & Pop up tab, and create the following:

Pop up type:
- Click on the Plus button at the bottom right corner
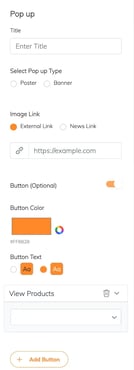
- Pick the option called Pop up type
- Place a Title
- Then, choose if you want to create a Poster or Banner, and upload an appropriate image. Required: video content should be 325px x 215px, while image content should be 325px x 510px
- Add a CTA Button, and provide additional asks such as Button Color, Button Text, and View Products - where you may pick which page can be linked to the button
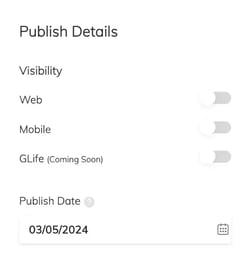
- Then lastly, choose your Publish Details, which include picking the channels that the pop up shall appear under Visibility, and setting your Publish Date.
Lastly, click on Draft or Save - the former lets you revisit this before it’s published, while the latter releases this immediately.
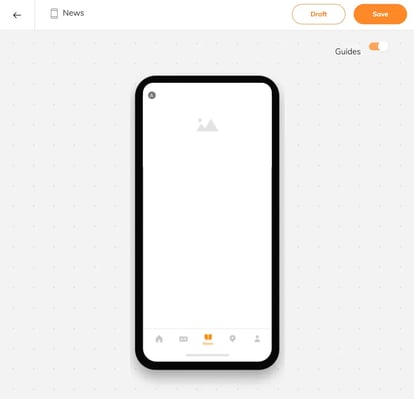
News type:
Set-up for this is quite similar to that of the Pop up type, but with key differences:
- Click the Plus button at the bottom right corner, and pick the News option
- Upload your pop-up image
- To supplement your pop-up image, you may also provide written Content (up to 2,000 characters)
- Along with your News content, you may also set up a Pop-up type
Lastly, click on Draft or Save - and you’re done!


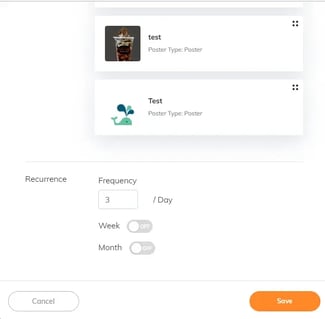
Once you have News or Pop up type banners available, you can open General Settings to manage the frequency and sequence of pop-up displays once a customer signs in.
You can set up the following:
- Sequential posting - drag-and-drop banners to arrange them in your preferred order of appearance
- Recurrence - you can adjust the number of times the pop-up will be displayed per day, week, or month
Click on Save to finalize your settings.