<img height="1" width="1" style="display:none" src="https://www.facebook.com/tr?id=653457899146166&amp;ev=PageView&amp;noscript=1">
Skip to content
English
  • There are no suggestions because the search field is empty.

Boost Sales with Email Blasts: Easy Guide for Merchants

Email blasts allow merchants to reach customers directly with updates, promotions, and announcements. Follow these steps to create and send an email broadcast through the CMS.


Steps to Create an Email Blast

1. Login to CMS

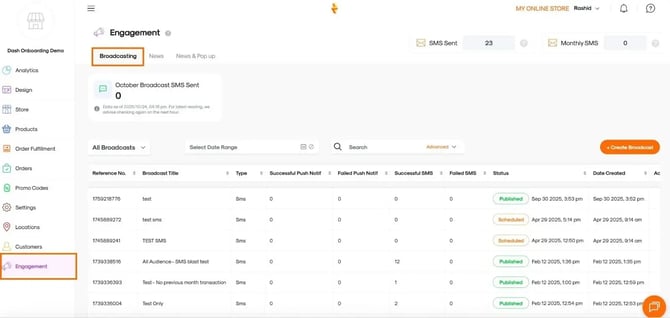
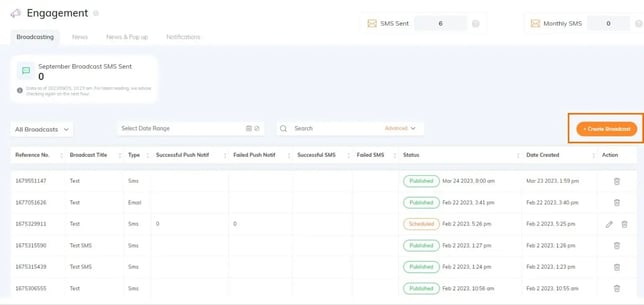
2. Navigate to the Engagement Module

  • Go to the Engagement Module.
  • Click the Broadcasting tab.

    Screenshot of the Broadcasting tab in the Engagement module, showing options to create, schedule, and manage message broadcasts to customers

3. Create a Broadcast

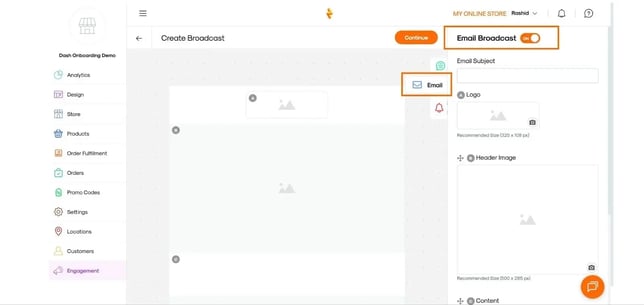
  • Click Create BroadcastBroadcasting tab in the Engagement module showing message creation and management options
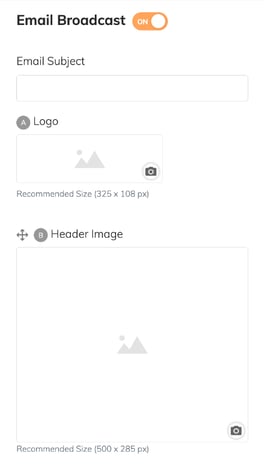
  • Enable Email Broadcast by toggling the button on

    Screenshot showing how to enable email broadcasting in the Engagement module.

4. Enter Email Details

Interface for creating an email broadcast in the Engagement module, including fields for email subject, logo and header imageemail-broadcastingEmail broadcasting screen showing how to add content, including text, images, and links, before sending to recipient


Provide the following information:

  • Email Subject – The subject line of your email.

  • Logo – Upload your brand logo. Required size: 325px x 108px (horizontal).

  • Header Image – Upload a banner image. Required size: 500px x 285px (horizontal).

  • Email Content – Enter your email message. You can use emojis and include clickable URL links.

A live preview of your email will appear in the center of the screen as you add content.


5. Continue to Broadcast Settings

  • Click Continue

  • Enter a Broadcast Title for internal reference.

            mail broadcast settings in the Engagement module with title, recipients, and publishing date options

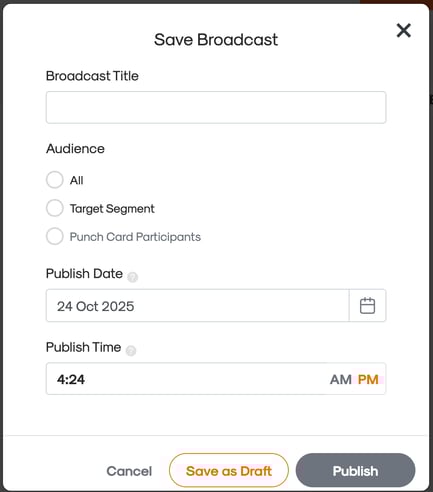
6. Select Your Audience

Choose who will receive the email:

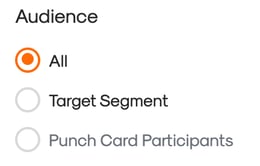
  • ALL – Sends to all customers.
    Selecting audience for an email broadcast: All, Target Segment, or Punch Card Participants
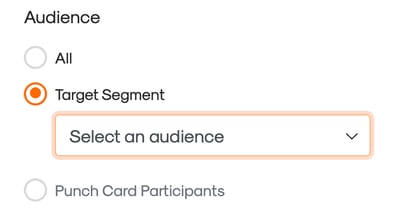
  • Target Segment – Sends to a pre-created segment of customers.

       electing audience for an email broadcast: Target Segment

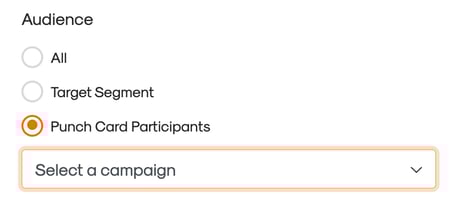
  • Punch Card Participants – Sends only to customers enrolled in your punch card program.

        electing audience for an email broadcast: Punch Card Participants

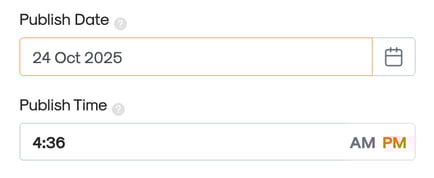
7. Set Publish Time and Date

  • Choose the desired Publish Time and Date for your broadcast.

       Setting the date and time to publish an email broadcast in the Engagement module.Setting the date and time to publish an email broadcast in the Engagement module

8. Cancel, Save or Publish

  • Click Save as Draft to review later.
  • Click Publish to send the broadcast immediately.
  • Click Cancel to leave without saving any broadcast setup you may have already accomplished.
    Publishing an email broadcast to the selected audience in the Engagement module


Important Notes

  • Customers will receive the broadcast only if their email is verified and linked to the CMS.

  • Ensure all images meet the required dimensions for optimal display across devices.