Enrolling Your Store's Employees
After taking some of the initial essential steps of building your online store- setting up your brands and adding your branches- you can now add employees and assign them to a specific branch. Enrolled employees are granted access to your merchant app in-store, so it is important for them to be knowledgeable about the app.
In this article:
Enrolling Your Employees
To enroll your employees:
- Go to the Store module and switch to the Employee tab.
- This tab gives you a full view of your employee roster, their contact information, and their activities and visibility on your merchant app.
Tip: Before adding an employee, use the search feature to search if an employee has already been enrolled to avoid duplication.
- Click + New Employee.
- On the pop-up window, provide the employee information such as name, contact information, and assigned brand and branch. For security purposes, an employee can only be assigned to one brand and branch at a time. Enable and set a unique employee PIN. This will be used by the employee to access the merchant app.
Tip: While enabling employee PIN in the app is not required, it is highly recommended for an added layer of security. This can only be configured using the CMS, so as a store owner, you have the sole control over the PIN activation and set-up
After enrollment, the employee will now appear under the Employee tab. You can also edit the employee information or delete from this tab.
Updating Employee Information
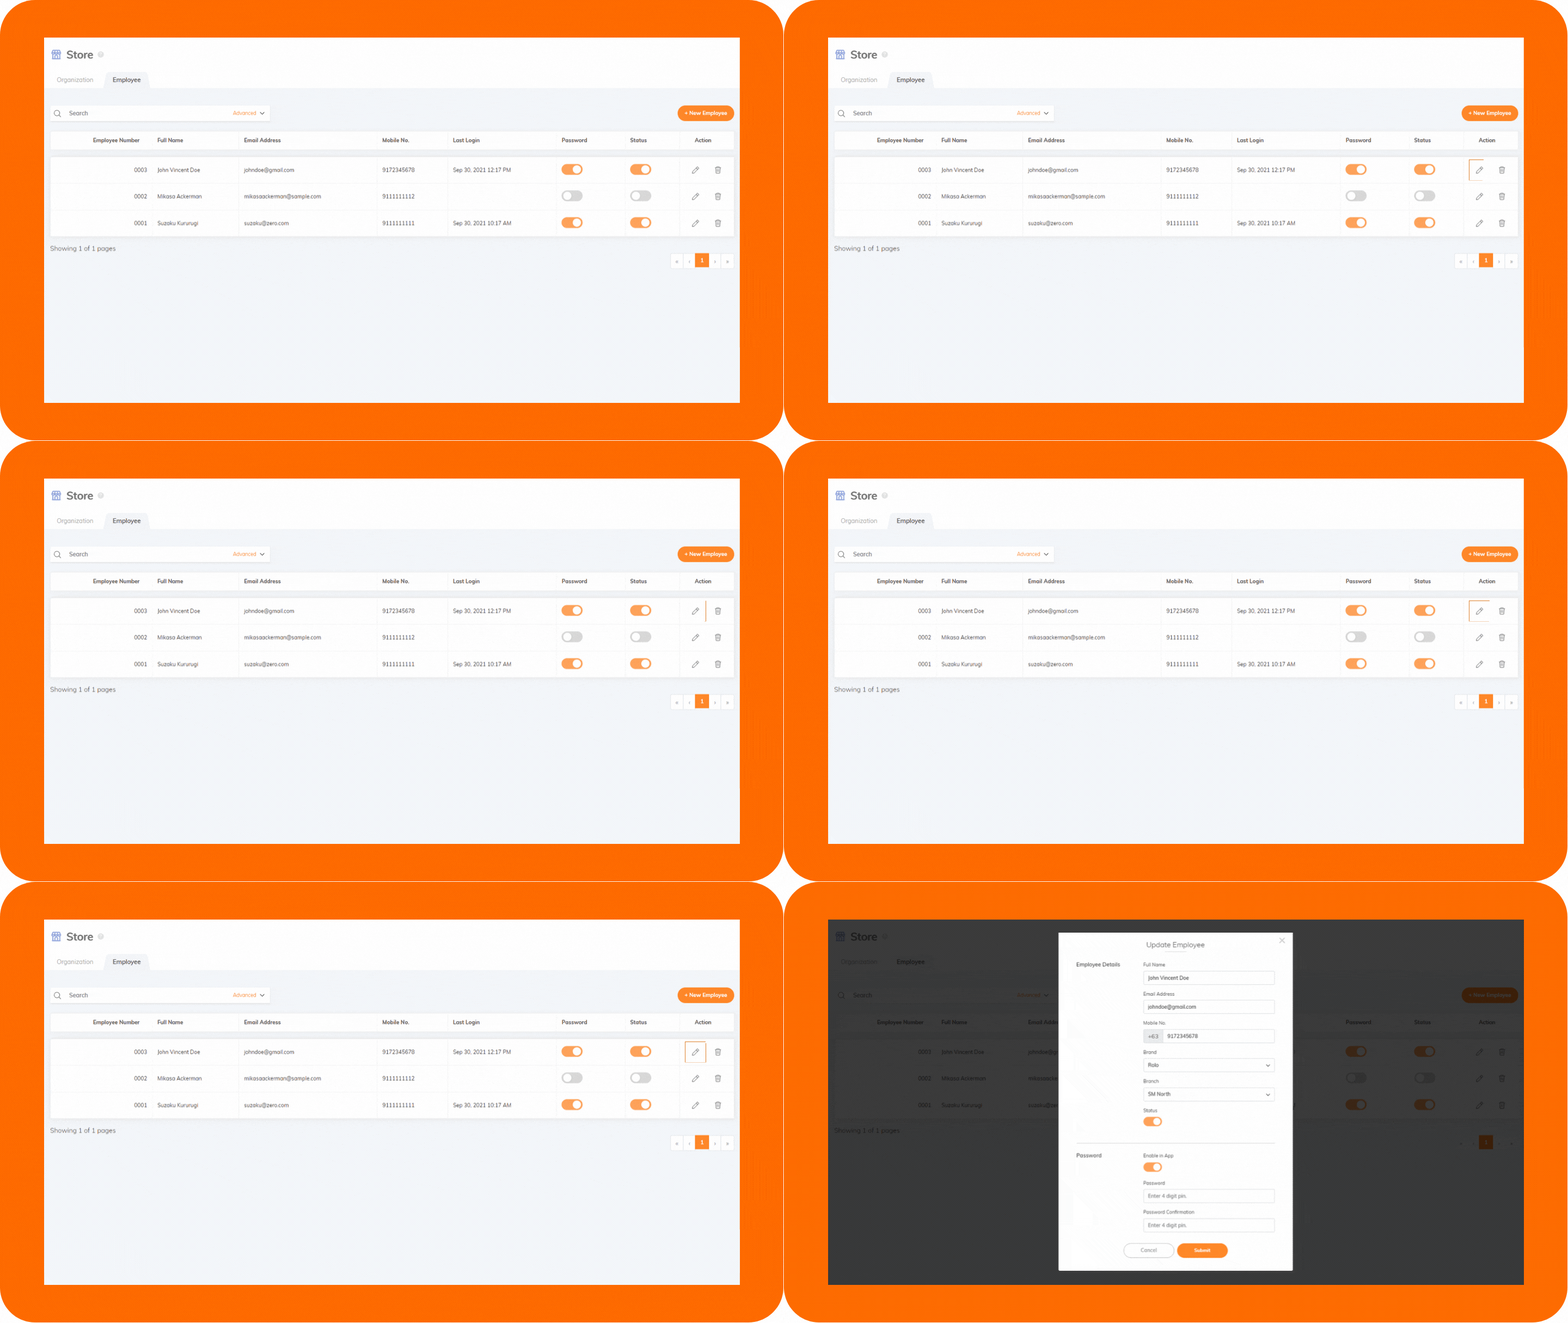
- To update your employee's information using the CMS:
- Search for the employee.
- Click the edit icon.
- Provide the updated information on the pop-up window.
- Click Submit.

Deleting an Employee
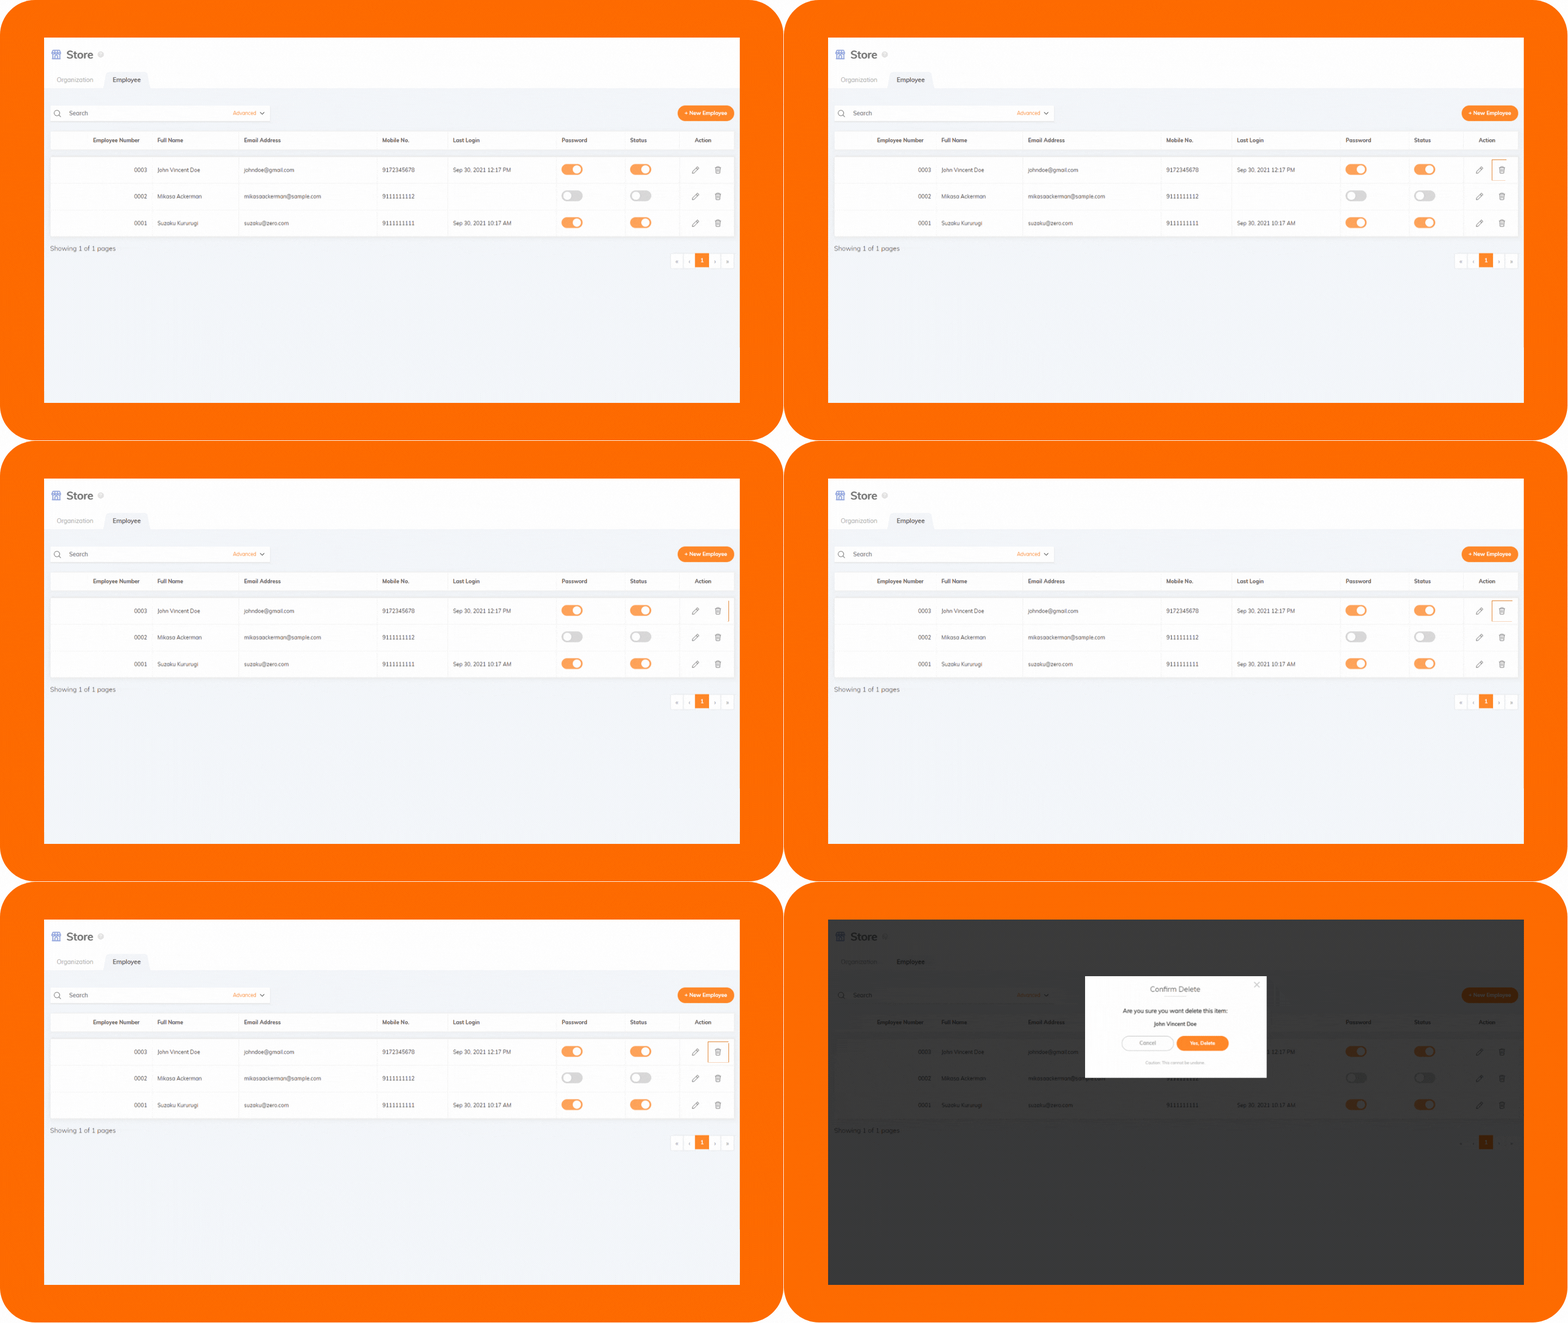
To delete an employee from your roster using the CMS:
- Search for the employee.
- Click the delete icon.
- Click Yes, Delete to confirm.

Upon enrollment, each employee is assigned a unique employee number. This, together with the unique PIN, fosters accountability among employees. So make sure that your employees don't share their log-in information details with each other.

