Deliver Now and Scheduled Delivery Settings
Learn more about on-demand and scheduled delivery options for your online store.
Deliver Now
Typically, the Deliver Now option allows you to get your products to your customers in the shortest amount of time. This applies to orders that are prepared immediately upon order confirmation and are shipped out immediately after a short preparation time that usually does not take more than an hour.
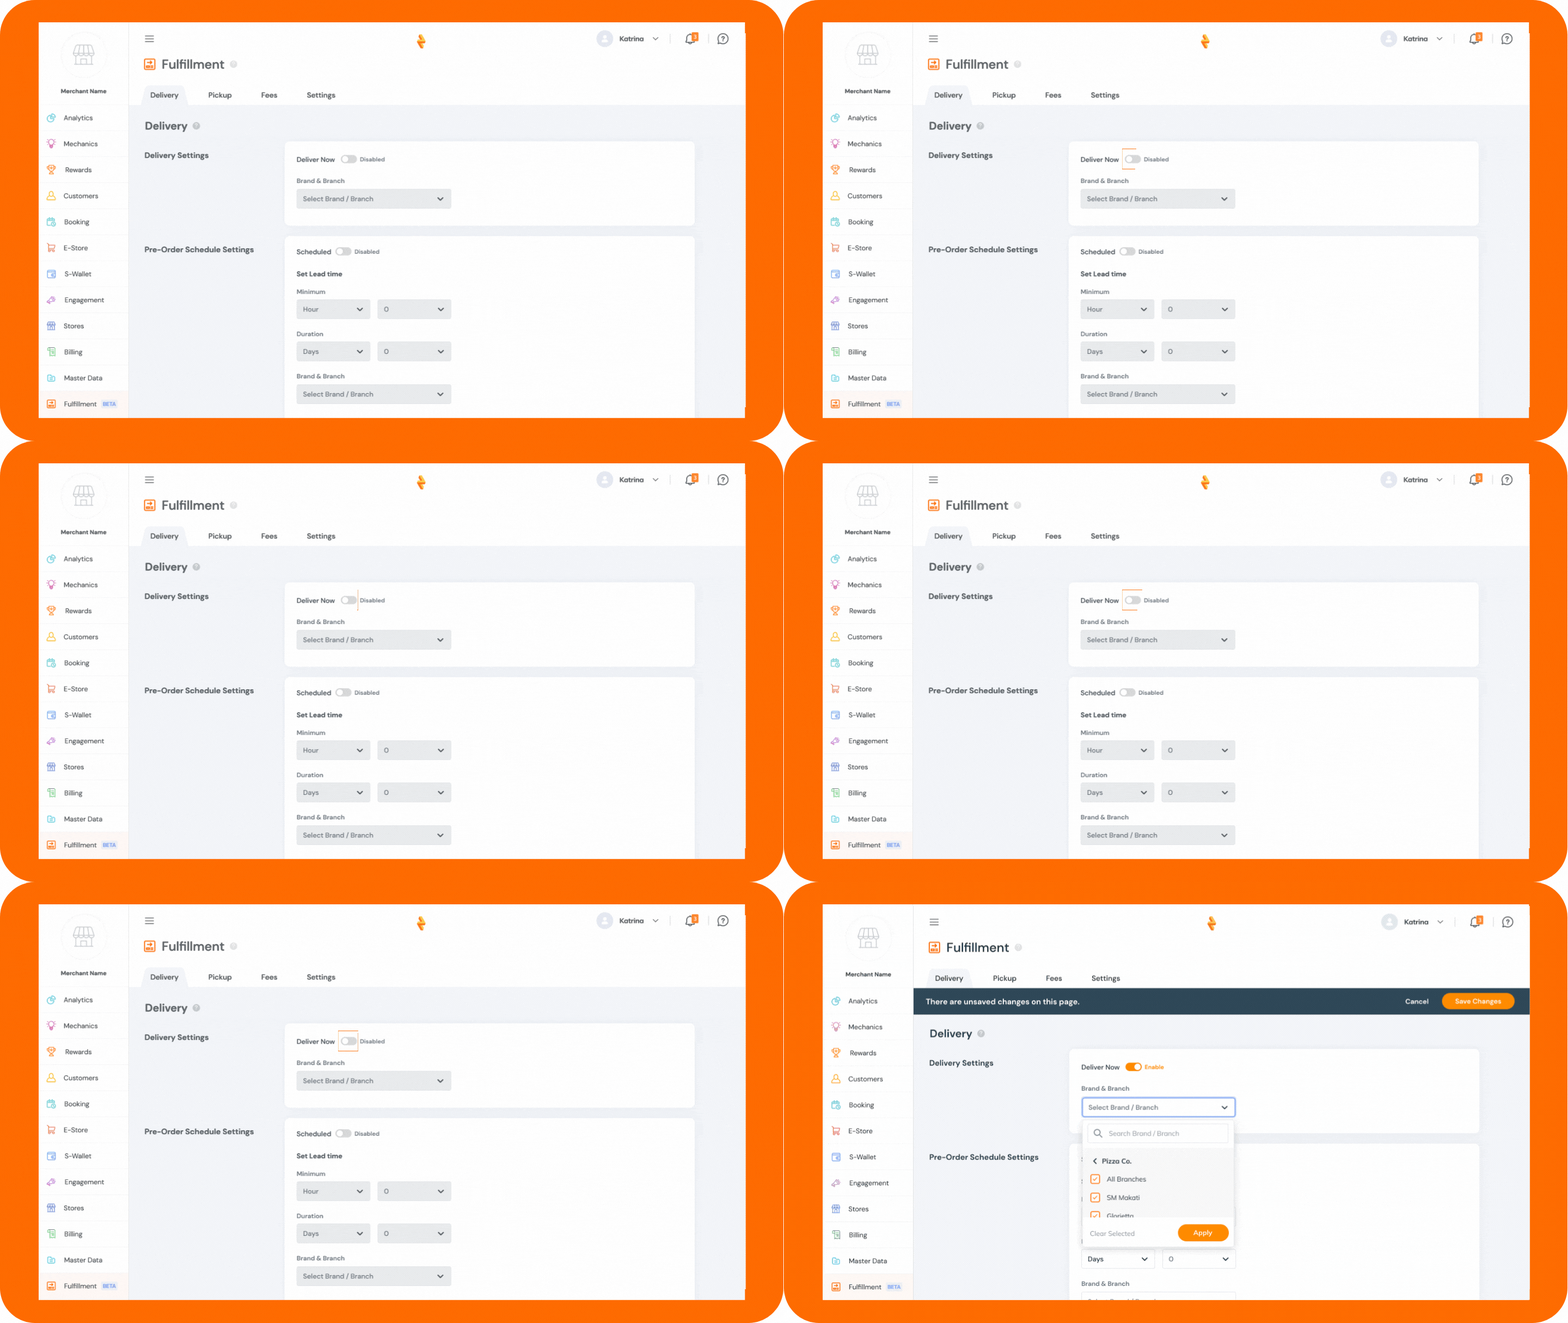
From your Order Fulfillment module, you can choose to enable or disable immediate delivery of your goods or products for specific brands or branches. To update the settings of your Deliver Now option:
- Go to the Delivery tab > Delivery Settings.
- Toggle the Deliver Now option to enable immediate delivery.
- From the dropdown menu, choose the Brand and Branch for which the Deliver Now option will be activated.
- Select which Brands and Branches can have the delivery option
- Mark the brand and/or branch you want to enable using the checkbox
- Multiple selections are allowed
- You can click ‘Clear Selected’ to remove all brands and branches you marked
- Click “Apply” once done with your selection.

Only the brands and branches that you have already onboarded will be shown in the dropdown menu. To learn more about adding, editing, or deleting your brands and branches, read here.
Pre-order Schedule (Scheduled Delivery)
Contrary to the Deliver Now option, the Scheduled Delivery gives you more time to prepare your orders way ahead of time- from hours to months before delivery. With this feature, you can set a lead time for preparing a customer's orders, set a period to display for customers to choose from, set an order capacity for each day, and configure the delivery schedule for each day pre-orders are processed.
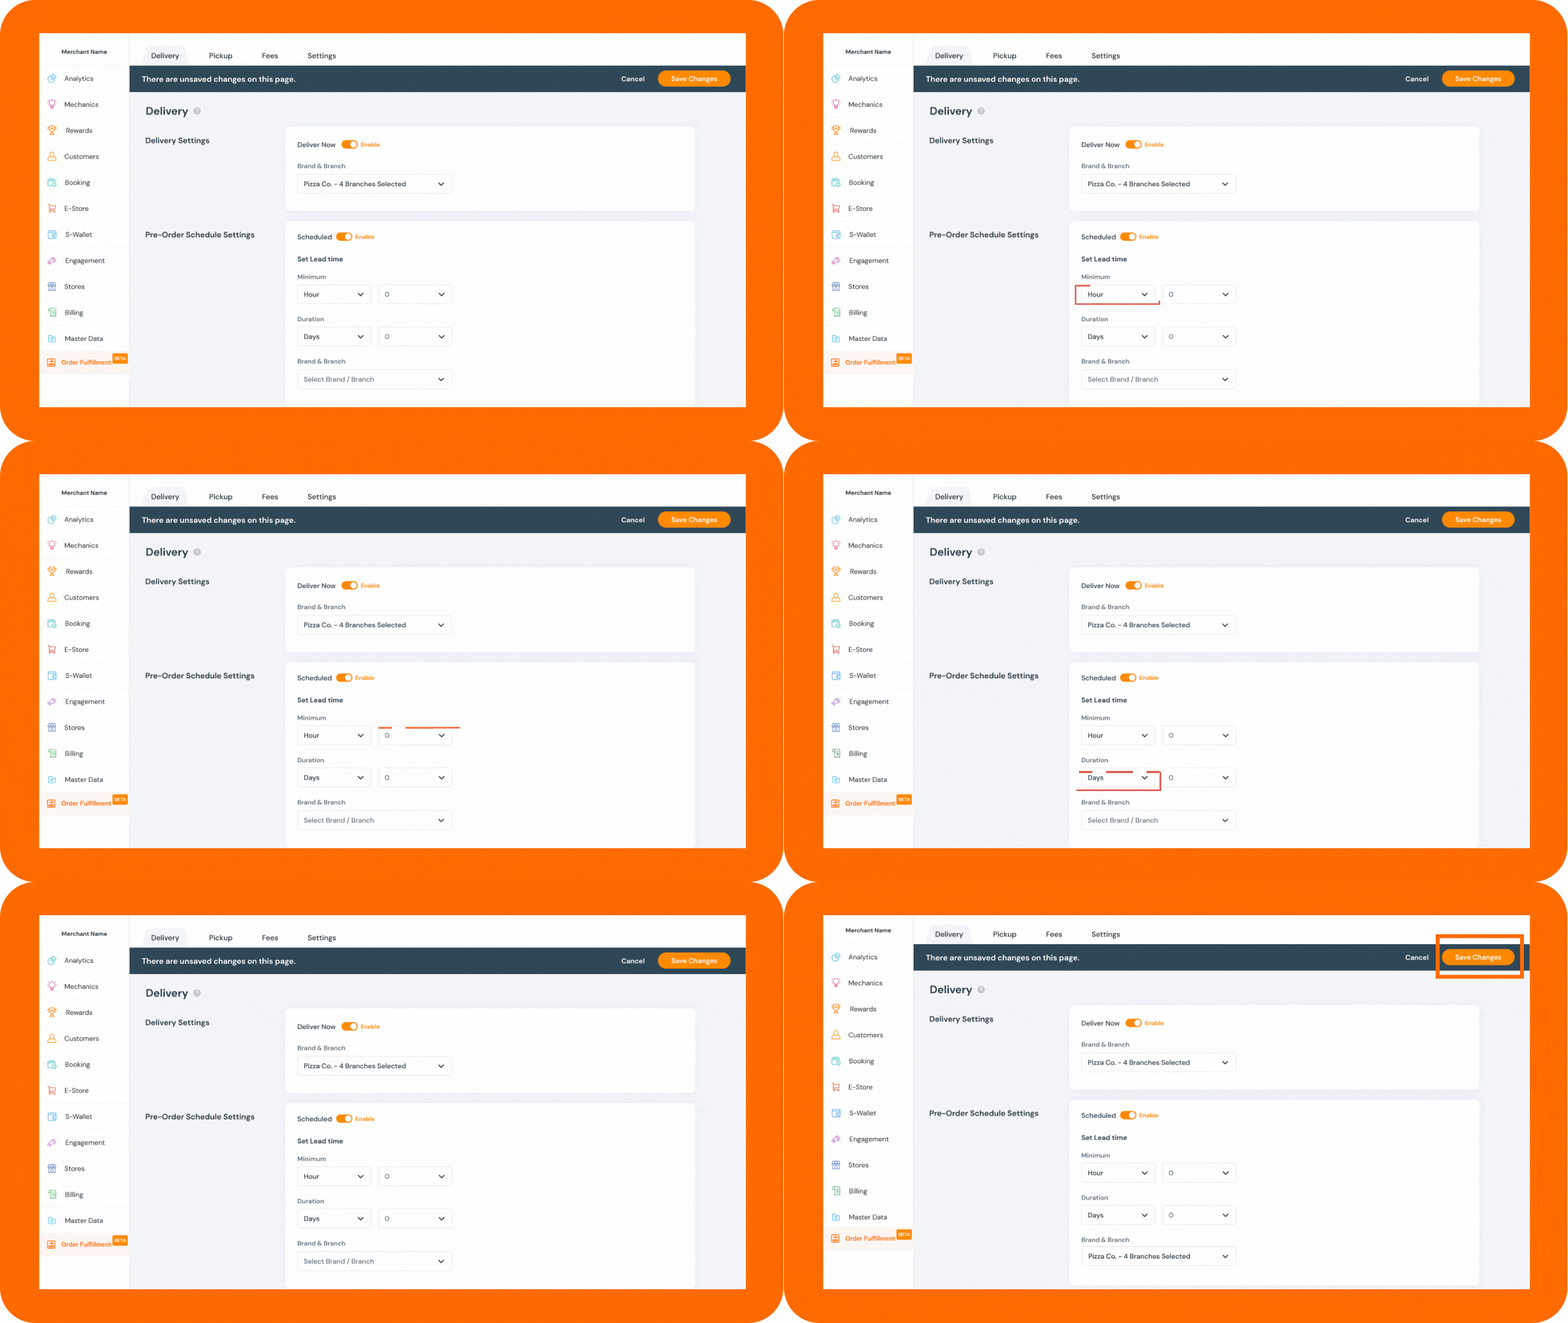
To configure your pre-order schedule from your Order Fulfillment module and start accepting advanced orders:
- Go to the Delivery tab > Pre-order Schedule Settings
- Toggle the Scheduled option to enable scheduled delivery
- Set the minimum lead time for the delivery of your orders
- Click the dropdown below “Minimum” to select among days, hours, or weeks.
- Set the advanced order duration
- From the dropdown menu, choose the number that corresponds to the duration you want to set. This shows how far ahead of the desired delivery schedule your customer is allowed to book.
- From the dropdown menu, choose the Brand and Branch for which the Pre-order Schedule Settings will apply.
- Mark the brand and/or branch you want to enable using the checkbox
- Multiple selections are allowed
- You can click ‘Clear Selected’ to remove all brands and branches you marked
- Click Save Changes.

Now, you can start updating the pre-ordering settings for each of your branches:
- On the Pre-ordering Settings section of the same tab, set-up the Pre-order Schedule for each of the branches you selected by clicking the Set up Pre Order Setting button.
- On the next page, you can choose which options to change - Ask for Days (AD) or Ask for Days and Time (ADT). By default, the pre-order days and time are based on your branch's operating schedule. To edit, click the Edit button, which will lead you to the settings page of the selected branch under the Store module.
- Select the maximum number of advanced orders that can be accepted by the branch from the dropdown menu.
- Click Save Changes at the top section once done.
