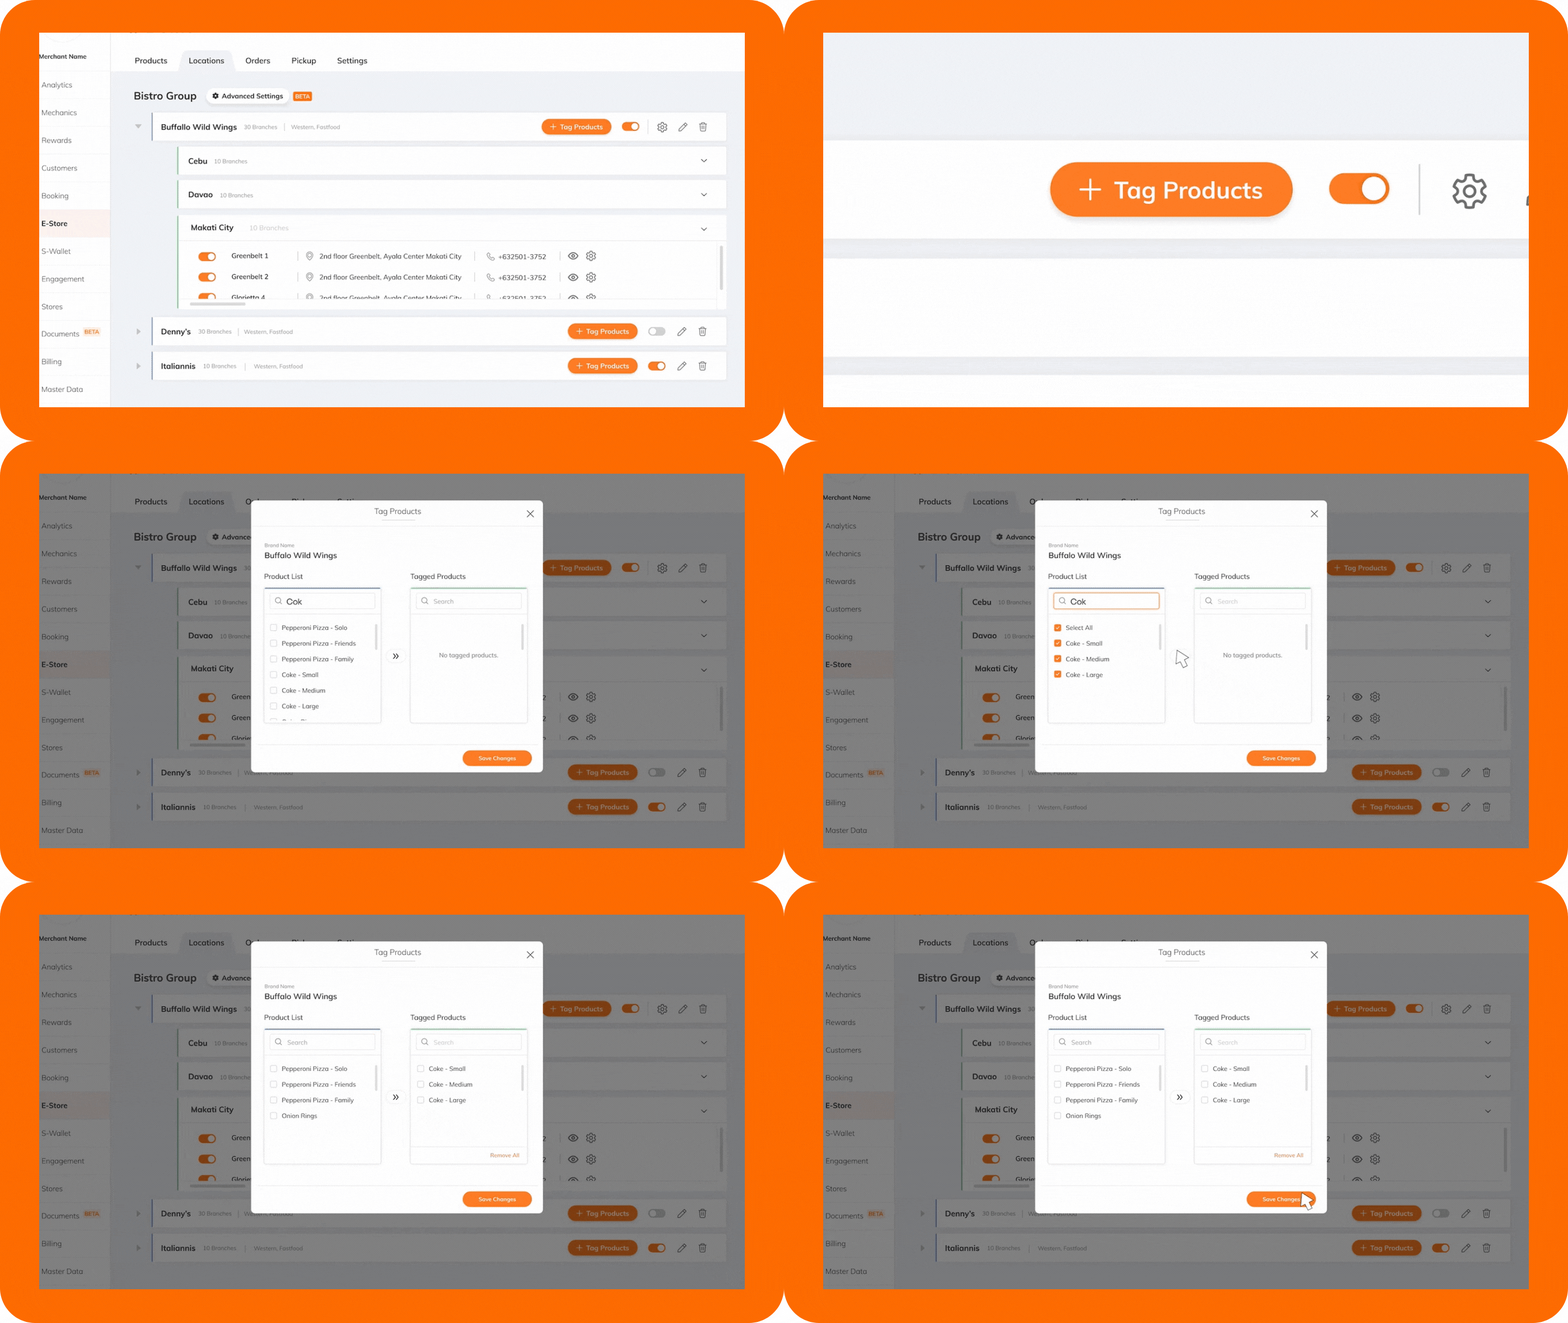
After successfully uploading all your products, inventories need to be tagged per brand and branch to appear on your eStore. This allows catalog customization, branch-exclusive offers, and stock monitoring per branch.
In this section:
Before you can customize your branch selections, you need to tag your products per brand.
Tagging Your Products Per Brand
Using the CMS:
-
Select the eStore module and go to the Locations tab where you can see all your onboarded* brands and branches.
-
Click the +Tag Products to display your list of products.
-
From your list, select the products that you will tag under your brand.
-
Click the arrow button to move these items under Tagged Products.
-
Once done, click Save Changes.

Now, all the items tagged under your brand/s are visible to all your branches on your CMS, merchant app, and eStore channels (web store and/or customer app).
The Locations tab only shows onboarded brands and branches. Should you need to add brand/s and/or branch/es, go to the Store module of your CMS and enroll new brands or branches.The Locations tab only shows onboarded brands and branches. Should you need to add brand/s and/or branch/es, go to the Store module of your CMS and enroll new brands or branches.
Making Brand-specific Changes
Once your products are tagged under your brand, you can now make the following branch-specific changes using the CMS:
-
Mark items on sale
-
Toggle visibility
-
Update stock quantity
-
Change the regular price
To mark items for sale per branch:
-
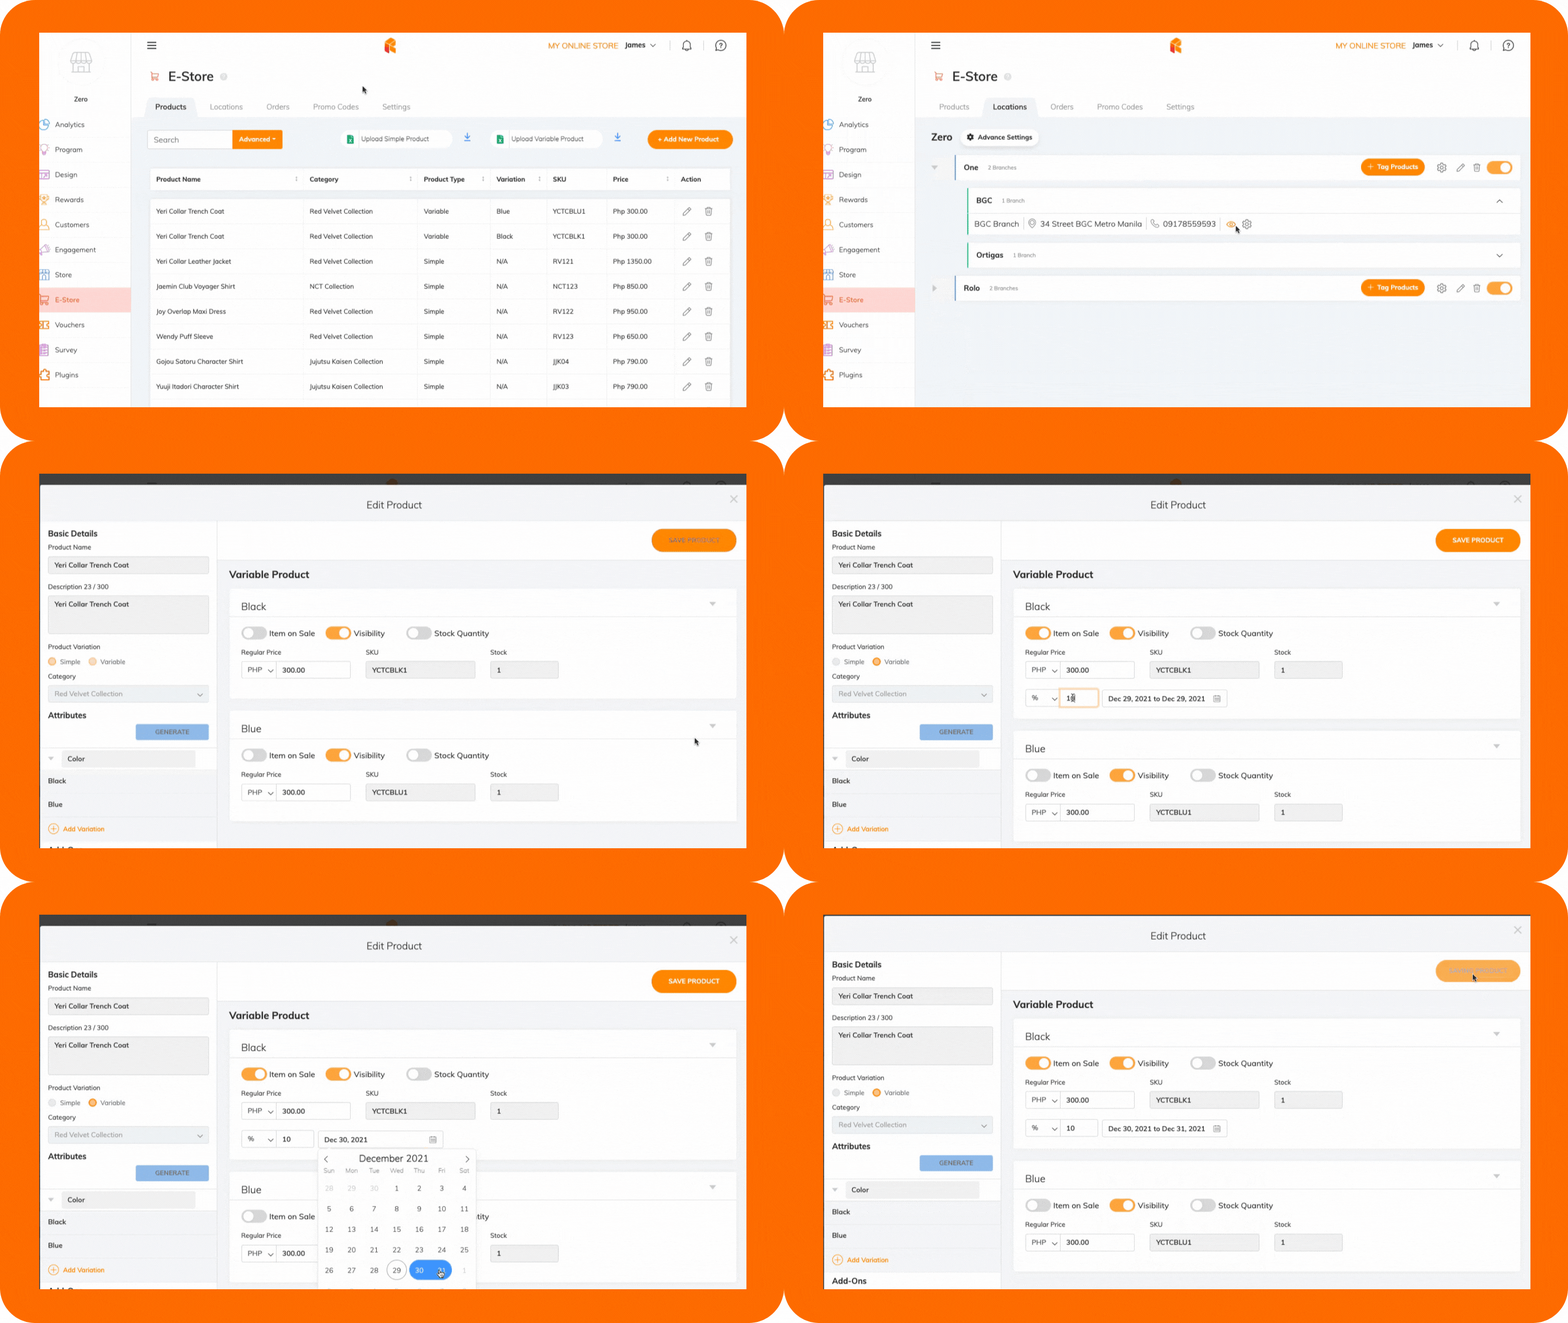
Go to the Locations tab of the eStore module.
-
Select the specific branch you want to edit.
-
Click the eye icon.
-
From the branch page, look for the product you want to mark on sale.
-
Click the edit icon.
-
On the pop-up window, toggle the Item On Sale option for each item, add-on (if applicable), or variation (for variable products only).
-
From the dropdown menu, select the discount type (% or peso value).
-
Input the discount rate or value.
-
Set the validity period.
-
Click SAVE PRODUCT.

To set the regular price of items per branch:
-
Go to the Locations tab of the eStore module.
-
Select the specific branch you want to edit.
-
Click the eye icon.
-
From the branch page, look for the product you want to update.
-
Click the edit icon.
-
On the pop-up window, input the regular price.
-
Click SAVE PRODUCT.
Branch-specific product tagging or updates can also be done using the in-store Merchant App. Check this article to know more: Tagging and Updating Products Per Branch.

